

When I first concocted my Tiered Heart Cake, it was on a whim inspired by a friend’s birthday celebration. As the doorway to my kitchen filled with the rich scent of melting butter and the sweet undertones of vanilla, I knew I was onto something special. This delightful dessert isn’t just a cake; it’s a love letter to home-cooked indulgence, beautifully layered and perfect for any occasion that calls for a little extra sweetness.
With just seven easy steps, you’ll create a breathtaking treat that not only impresses your guests but also warms their hearts. The combination of chocolate and fluffy frosting makes it versatile enough for both casual gatherings and formal events. Whether you’re celebrating love, friendship, or simply the joy of baking, this Tiered Heart Cake transforms any moment into a memorable one. So, let’s dive in and discover how to whip up this beautiful delight that brings a little sunshine to every plate!
Why is Tiered Heart Cake a must-try?
Irresistible appeal: This cake’s stunning heart shape makes it an instant attention-grabber at parties.
Easy to bake: With just seven simple steps, even novice bakers will feel empowered to create this masterpiece.
Flavorful combination: The rich cocoa and creamy frosting create a delightful balance of sweet decadence.
Versatile for all occasions: Perfect for birthdays, anniversaries, or any celebration that deserves a touch of love.
Crowd-pleaser: Guaranteed to bring smiles and compliments from friends and family alike, it’s a dessert that truly brings people together.
Tiered Heart Cake Ingredients
Here’s what you’ll need to create this beautiful delight!
For the Cake Batter
- All-purpose flour – a versatile base for the cake that gives it structure.
- Sugar – enhances sweetness and contributes to a moist texture.
- Unsalted butter – creamy goodness that adds richness and flavor.
- Large eggs – bind the ingredients together while adding moisture and stability.
- Milk – keeps the batter smooth and enhances the cake’s tenderness.
- Baking powder – helps the cake rise, giving it that fluffy texture.
- Vanilla extract – adds a fragrant, warm flavor that complements the cocoa.
- Cocoa powder – provides the rich chocolate flavor that makes this cake irresistible.
For the Frosting
- Powdered sugar – creates a sweet, smooth texture for your frosting.
- Heavy cream – whips up beautifully, making the frosting light and fluffy.
With these tender ingredients, your Tiered Heart Cake will be an absolute showstopper! Happy baking!
How to Make Tiered Heart Cake
- Preheat your oven by setting it to 350°F (175°C). This is crucial for achieving that perfect rise in your cake.
- Grease and flour two heart-shaped cake pans. Cover all surfaces evenly to ensure your cakes release beautifully after baking.
- Cream together the unsalted butter and sugar in a bowl until it’s light and fluffy, about 3-5 minutes. This step is vital for aerating the batter.
- Add the eggs one at a time, mixing well after each addition until fully incorporated. You want a smooth, luscious batter that’s bursting with richness.
- Stir in the milk and vanilla extract, mixing just until combined. This will give your batter a delightful flavor and moist texture.
- Combine in a separate bowl the flour, baking powder, and cocoa powder. Gradually add this dry mixture to the wet ingredients, stirring until just combined without over-mixing.
- Pour the batter into the prepared heart-shaped pans and bake for 30-35 minutes, or until a toothpick inserted in the center comes out clean. Let them cool completely before frosting.
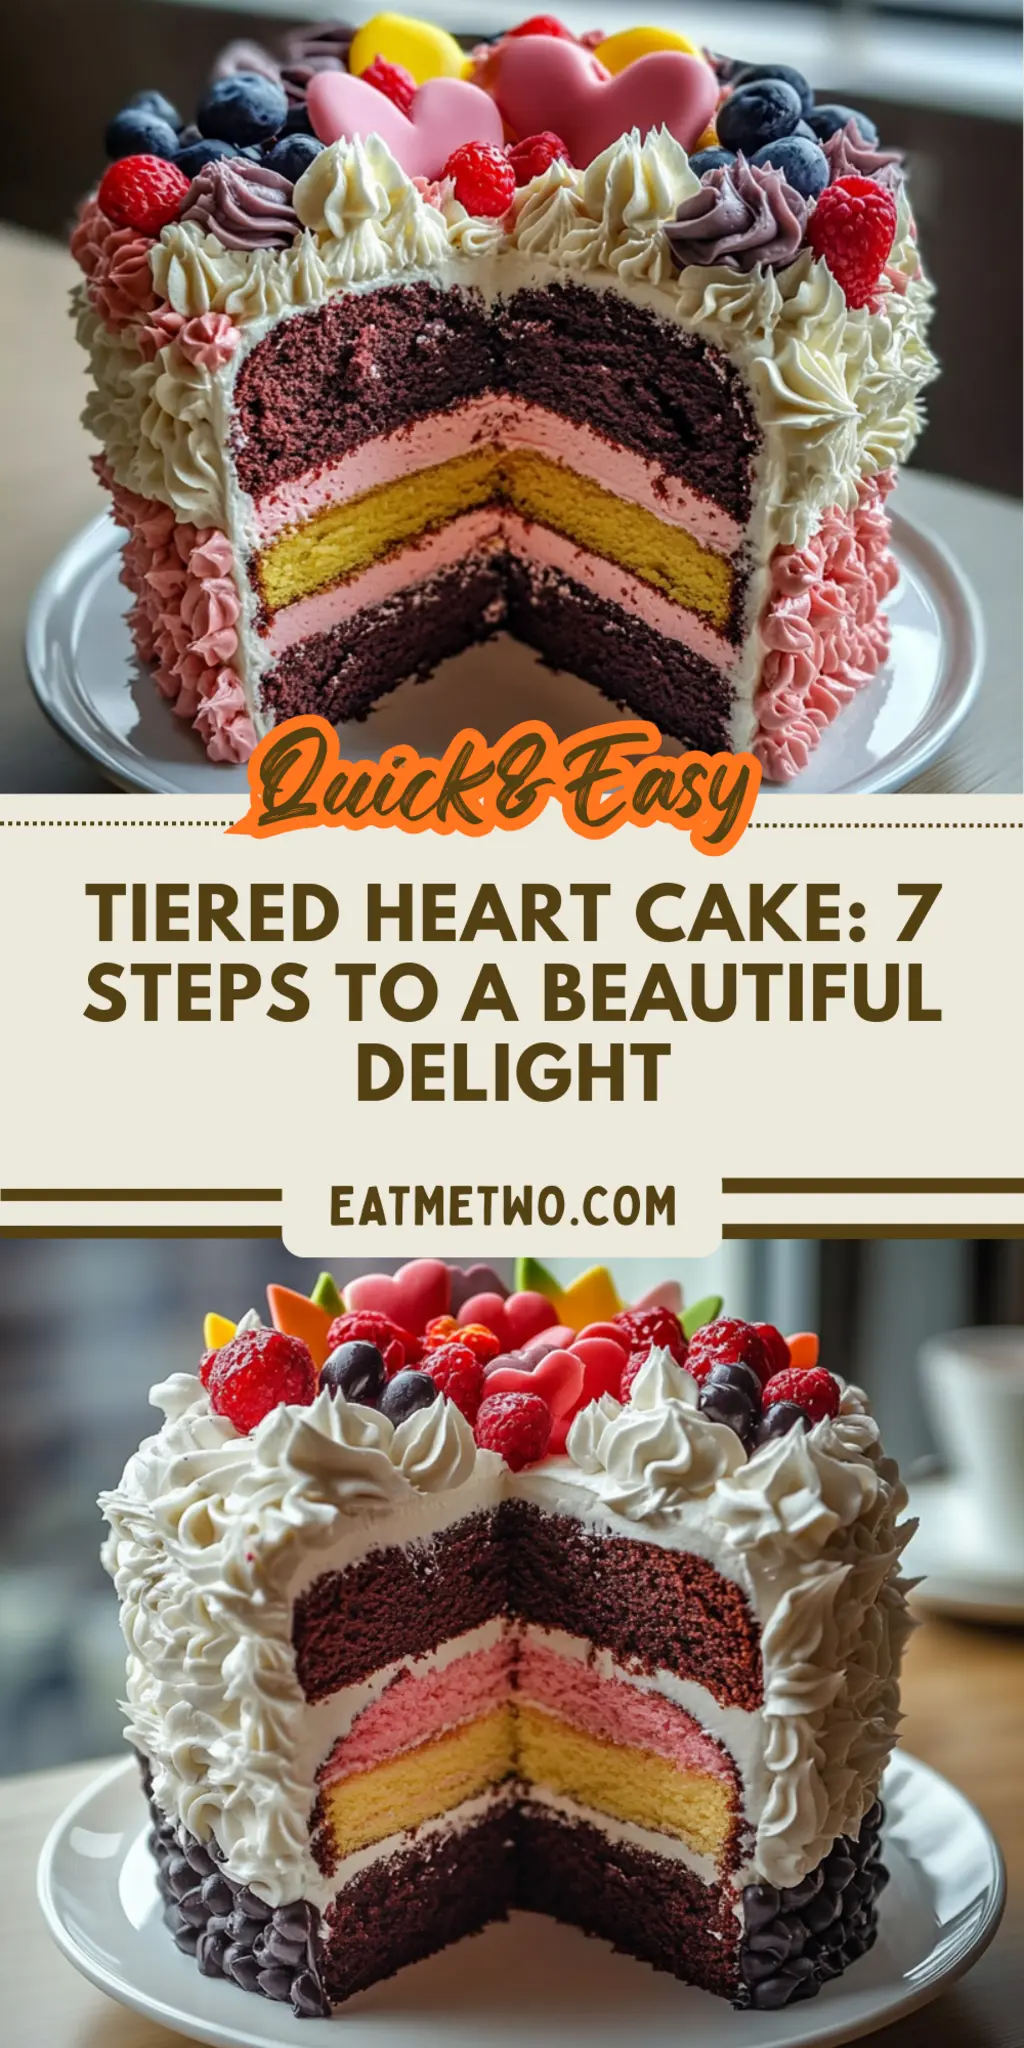
Optional: Decorate with fresh berries or chocolate shavings for an extra touch of elegance!
Exact quantities are listed in the recipe card below.
Make Ahead Options
These Tiered Heart Cakes are perfect for busy home cooks looking to save time! You can prepare the cake layers up to 3 days in advance by baking them and allowing them to cool completely. Once cooled, wrap each layer tightly in plastic wrap and refrigerate to keep them fresh and moist. The frosting can also be made ahead of time and stored in an airtight container in the fridge for up to 2 days. When you’re ready to serve, simply frost the layers and assemble the cake. With these make-ahead options, you’ll have a stunning dessert ready with minimal last-minute effort, just as delicious as if baked fresh!
What to Serve with Tiered Heart Cake?
There’s something magical about enjoying a sweet dessert, especially when paired with delightful accompaniments that enhance every bite.
-
Fresh Berries: A medley of strawberries, raspberries, and blueberries adds a burst of refreshing flavor and elegant color, complementing the rich chocolate of the cake.
-
Vanilla Ice Cream: The creamy, dreamy texture of vanilla ice cream provides a delightful contrast to the cake’s softness, creating a classic pairing that everyone loves.
-
Chocolate Ganache: Drizzling warm chocolate ganache over each slice elevates the experience, intensifying the cocoa flavor while adding a luxurious shine.
-
Espresso or Coffee: A steaming cup of espresso or your favorite brew enhances the sweetness and richness of the cake, making each bite feel like a gourmet café experience.
-
Whipped Cream: Light and airy whipped cream brings a delicate sweetness, perfect for balancing the cake’s rich layers while adding a lovely visual element.
-
Fruit Tart: A side of fruity tart provides zingy notes and a textural contrast, making your dessert table even more enticing and filled with variety.
Each pairing option can transform your Tiered Heart Cake into a complete culinary experience that delights the senses and warms the heart. Enjoy every moment of indulgence!
Tiered Heart Cake Variations
Feel free to tailor this delightful cake to your taste and dietary needs!
-
Gluten-Free: Substitute all-purpose flour with a 1:1 gluten-free blend for a deliciously fluffy cake that everyone can enjoy.
-
Dairy-Free: Use coconut milk and dairy-free butter to maintain creaminess while making this cake suitable for lactose-intolerant friends. Just as rich, just as delightful!
-
Sugar-Free: Swap granulated sugar for a natural sweetener, like erythritol or stevia, keeping it sweet while cutting down on calories. It’s a win-win!
-
Chocolate Lovers: Enhance the cocoa flavor by adding 1 extra tablespoon of cocoa powder to the batter, creating an indulgent chocolate experience. Rich heaven awaits!
-
Fruity Twist: Incorporate 1 cup of mashed ripe bananas or pureed apples into the batter for added moisture and natural sweetness, giving a fruity surprise to each slice.
-
Nutty Crunch: Fold in 1/2 cup of chopped nuts, such as walnuts or almonds, for a lovely crunch that contrasts beautifully with the softness of the cake.
-
Spicy Kick: Add a teaspoon of cinnamon or a pinch of cayenne pepper to the batter, creating a unique flavor that makes every bite unfold with warmth.
-
Frosting Flare: Swap out the heavy cream for cream cheese to prepare a tangy frosting for a delectable twist that perfectly complements the sweetness of the cake.
How to Store and Freeze Tiered Heart Cake
- Room Temperature: You can keep the Tiered Heart Cake at room temperature for up to 3 days, covered with a cake dome or plastic wrap to maintain moisture.
- Fridge: To prolong freshness, store the cake in the refrigerator for up to 5 days. Wrap it tightly in plastic wrap to prevent it from absorbing other fridge odors.
- Freezer: For longer storage, freeze the unfrosted cake layers for up to 3 months. Wrap them snugly in plastic wrap followed by aluminum foil to prevent freezer burn.
- Reheating: Thaw the frozen layers overnight in the fridge before frosting. After frosting, enjoy at room temperature for the best taste and texture.
Expert Tips for Tiered Heart Cake
- Perfect Pan Prep: Ensure your heart-shaped pans are well-greased and floured. This prevents sticking and guarantees a perfect release after baking.
- Avoid Overmixing: When combining dry and wet ingredients, mix just until incorporated. Overmixing can result in a dense cake rather than a fluffy Tiered Heart Cake.
- Cake Cooling: Let the cakes cool completely on a wire rack before frosting. This good practice prevents the frosting from melting and guarantees a beautiful finish.
- Frosting Tip: Whip the heavy cream until soft peaks form before adding powdered sugar. This step creates a light and airy frosting that pairs perfectly with your cake.
- Layer Evenly: When stacking the cake, ensure each layer is even and level for a balanced look. Use a serrated knife to trim any uneven parts before frosting.
- Decorate Creatively: Feel free to add finishing touches with fruit, sprinkles, or even chocolate curls for that extra magic. Your Tiered Heart Cake will impress everyone visually and taste-wise!
Tiered Heart Cake Recipe FAQs
How do I choose the right ripeness of ingredients?
Absolutely! For this recipe, ensure your eggs are at room temperature—they mix more easily and help create a fluffier cake. Your butter should also be softened but not melted; look for a creamy texture that can be easily whipped with sugar. If you’re using milk, make sure it’s fresh and has not passed its expiration date for the best flavor.
What is the best way to store leftover cake?
You can keep your Tiered Heart Cake at room temperature for up to 3 days, simply covering it with a cake dome or plastic wrap to maintain moisture. If you’d like to extend its shelf life, wrapping it tightly in plastic wrap and placing it in the refrigerator will help keep it fresh for up to 5 days.
Can I freeze the cake?
Yes! I often freeze the unfrosted layers if I want to prepare ahead. Wrap them snugly in plastic wrap and then in aluminum foil to prevent freezer burn. They can last up to 3 months. To thaw, simply place them in the fridge overnight, and they’ll be ready for frosting the next day.
What should I do if the cake doesn’t rise properly?
If your Tiered Heart Cake doesn’t rise as expected, it might be due to old baking powder. Check the expiration date before use. Also, ensure you properly creamed the butter and sugar, as this aeration step is critical for a fluffy texture. Lastly, avoid overmixing the batter once you add the dry ingredients—just mix until combined to keep it light.
Are there any dietary considerations for this recipe?
The cake contains gluten and dairy, so it’s not suitable for those with celiac disease or lactose intolerance. For a gluten-free option, you can substitute all-purpose flour with a 1:1 gluten-free baking blend. If you need a dairy-free version, use plant-based butter and non-dairy milk instead. Always check with your guests to accommodate any allergies or dietary preferences!

Delightful Tiered Heart Cake: 7 Easy Steps to Create Magic
Ingredients
Equipment
Method
- Preheat your oven by setting it to 350°F (175°C). This is crucial for achieving that perfect rise in your cake.
- Grease and flour two heart-shaped cake pans. Cover all surfaces evenly to ensure your cakes release beautifully after baking.
- Cream together the unsalted butter and sugar in a bowl until it's light and fluffy, about 3-5 minutes.
- Add the eggs one at a time, mixing well after each addition until fully incorporated.
- Stir in the milk and vanilla extract, mixing just until combined.
- Combine in a separate bowl the flour, baking powder, and cocoa powder. Gradually add this dry mixture to the wet ingredients, stirring until just combined without over-mixing.
- Pour the batter into the prepared heart-shaped pans and bake for 30-35 minutes, or until a toothpick inserted in the center comes out clean.
- Whip the heavy cream until soft peaks form before adding powdered sugar to create a light and airy frosting.
- Let the cakes cool completely on a wire rack before frosting.
- Frost the cooled cakes, and stack them carefully, ensuring each layer is even.
- Decorate as desired with fresh berries or chocolate shavings.


Leave a Comment